
Table of Contents
فوائد الترقية إلى مصابيح عدسة جهاز العرض LED المحدثة للسيارة
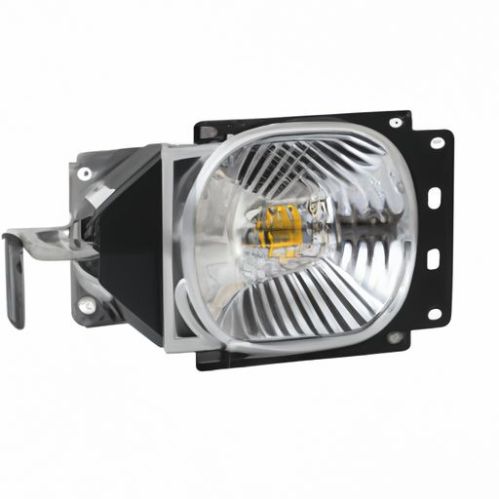
دليل خطوة بخطوة لتثبيت مصابيح عدسة جهاز العرض LED المحدثة للسيارة
قبل أن تبدأ، تأكد من توفر جميع الأدوات والمواد اللازمة لديك. ستحتاج إلى مصابيح عدسة جهاز العرض LED ومفك البراغي وقواطع الأسلاك والشريط الكهربائي ومصدر الطاقة. إنها فكرة جيدة أيضًا أن يكون لديك صديق أو أحد أفراد العائلة لمساعدتك أثناء عملية التثبيت.
الخطوة الأولى هي إزالة المصابيح الأمامية الموجودة من سيارتك. يمكن القيام بذلك عادةً عن طريق إزالة بعض البراغي أو المشابك التي تثبت المصباح الأمامي في مكانه. بمجرد إزالة المصباح الأمامي، افصل مجموعة الأسلاك من الجزء الخلفي للمصباح الأمامي وضعها جانبًا.
بعد ذلك، ستحتاج إلى تثبيت مصابيح عدسة جهاز العرض LED. ابدأ بتوصيل مجموعة الأسلاك الخاصة بأضواء عدسة جهاز العرض LED بمجموعة الأسلاك في سيارتك. تأكد من مطابقة الأسلاك الموجبة والسالبة بشكل صحيح لتجنب أي مشاكل كهربائية.
بمجرد توصيل الأسلاك، قم بتثبيت مصابيح عدسة جهاز العرض LED في مكانها باستخدام البراغي المتوفرة. تأكد من وضع الأضواء بشكل صحيح وتثبيتها بشكل آمن لمنع أي حركة أثناء القيادة.
بعد تثبيت مصابيح عدسة جهاز العرض LED، حان الوقت لاختبارها للتأكد من أنها تعمل بشكل صحيح. قم بتوصيل مجموعة الأسلاك بمصدر الطاقة وتشغيل الأضواء. تحقق من وجود أي وميض أو تعتيم، لأن ذلك قد يشير إلى وجود اتصال خاطئ.
إذا كانت المصابيح تعمل بشكل صحيح، فيمكنك المتابعة لضبط نمط شعاع مصابيح عدسة جهاز العرض LED. يمكن القيام بذلك عادةً عن طريق تدوير العدسة أو ضبط موضع تركيب الأضواء. تأكد من محاذاة نمط الضوء بشكل صحيح لتجنب عمى السائقين الآخرين على الطريق.
بمجرد ضبط نمط الشعاع، قم بتثبيت مصابيح عدسة جهاز العرض LED في موضعها النهائي عن طريق ربط البراغي. تحقق جيدًا من جميع التوصيلات وتأكد من أن كل شيء آمن قبل إعادة توصيل مجموعة الأسلاك بالجزء الخلفي من المصابيح.
وأخيرًا، أعد تثبيت المصابيح الأمامية مرة أخرى على سيارتك عن طريق تثبيتها بالمسامير أو المشابك. تأكد من محاذاة المصابيح الأمامية بشكل صحيح وتثبيتها بشكل آمن لمنع أي حركة أثناء القيادة.
في الختام، يمكن أن يكون تثبيت مصابيح عدسة جهاز العرض LED على سيارتك بمثابة ترقية مجزية تعمل على تحسين مظهر سيارتك وأدائها. باتباع هذا الدليل التفصيلي، يمكنك تثبيت مصابيح عدسة جهاز العرض LED بنجاح على سيارتك والاستمتاع برؤية محسنة على الطريق. تذكر أن تأخذ وقتك وتتحقق مرة أخرى من جميع الاتصالات لضمان التثبيت الآمن والناجح.
Before you begin, make sure you have all the necessary tools and materials on hand. You will need the LED projector lens lights, a Screwdriver, wire cutters, electrical tape, and a power source. It’s also a good idea to have a friend or family member assist you during the installation process.
The first step is to remove the existing headlights from your car. This can usually be done by removing a few Screws or Clips that hold the headlight in place. Once the headlight is removed, disconnect the Wiring Harness from the back of the headlight and set it aside.
Next, you will need to install the LED projector lens lights. Start by connecting the wiring harness of the LED projector lens lights to the wiring harness of your car. Make sure to match the positive and negative wires correctly to avoid any electrical issues.
Once the wiring is connected, secure the LED projector lens lights in place using the screws provided. Make sure the lights are positioned correctly and securely fastened to prevent any movement while driving.
After the LED projector lens lights are installed, it’s time to test them to ensure they are working properly. Connect the wiring harness to a power source and turn on the lights. Check for any flickering or dimness, as this could indicate a faulty connection.
If the lights are working correctly, you can proceed to adjust the beam pattern of the LED projector lens lights. This can usually be done by rotating the lens or adjusting the mounting position of the lights. Make sure the beam pattern is aligned properly to avoid blinding other drivers on the road.
Once the beam pattern is adjusted, secure the LED projector lens lights in their final position by tightening the screws. Double-check all connections and make sure everything is secure before reattaching the wiring harness to the back of the lights.
Finally, reinstall the headlights back onto your car by securing them with the screws or clips. Make sure the headlights are aligned properly and securely fastened to prevent any movement while driving.
In conclusion, installing LED projector lens lights on your car can be a rewarding upgrade that enhances both the look and performance of your vehicle. By following this step-by-step guide, you can successfully install LED projector lens lights on your car and enjoy improved visibility on the road. Remember to take your time and double-check all connections to ensure a safe and successful installation.