
Table of Contents
إيجابيات وسلبيات استخدام الجدار الخارجي المركب PVC لأسقف السقف
كيفية تركيب الجدار الخارجي المركب PVC لأسقف السقف
تعد الجدران الخارجية المركبة PVC خيارًا شائعًا لأسقف السقف نظرًا لمتانتها وقلة صيانتها وجاذبيتها الجمالية. يعد تركيب الجدران الخارجية المركبة من مادة PVC لأسقف السقف عملية مباشرة يمكن إكمالها بواسطة عشاق الأعمال اليدوية أو المقاولين المحترفين. في هذه المقالة، سنقدم دليلًا خطوة بخطوة حول كيفية تثبيت الجدران الخارجية المركبة PVC لأسقف السقف.
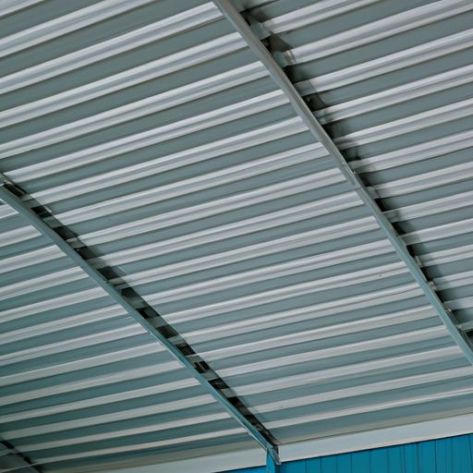
بعد ذلك، قم بقياس وقطع ألواح الجدران الخارجية المركبة PVC لتناسب أبعاد سقف السقف. استخدم منشارًا لقطع الألواح بالحجم الصحيح، مع الحرص على إجراء عمليات قطع دقيقة. من المهم القياس بدقة لضمان تركيب سلس وذو مظهر احترافي.
بمجرد قطع الألواح حسب الحجم، ضع مادة لاصقة على الجزء الخلفي من كل لوحة. اضغط على الألواح بقوة على سقف السقف، مع التأكد من أنها مستوية ومحاذاتها بشكل صحيح. استخدم ميزانًا للتأكد من استقامة الألواح وضبطها حسب الضرورة. قم بتثبيت الألواح في مكانها باستخدام البراغي، مع التأكد من تثبيت البراغي في المسامير لمزيد من الثبات.
استمر في هذه العملية حتى يتم تغطية سقف السقف بالكامل بألواح الجدران الخارجية المركبة من مادة PVC. قم بقص أي مواد زائدة حسب الحاجة للحصول على لمسة نهائية نظيفة ومصقولة. بمجرد اكتمال التثبيت، اترك المادة اللاصقة حتى تجف تمامًا قبل إضافة أي لمسات نهائية أو ديكورات.
تعد الجدران الخارجية المركبة من مادة PVC لأسقف الأسقف خيارًا متعدد الاستخدامات وعمليًا لأصحاب المنازل الذين يتطلعون إلى تحسين مظهر مساحة معيشتهم. مع التركيب والصيانة المناسبة، يمكن للجدران الخارجية المركبة PVC أن توفر سنوات من الجمال والأداء الوظيفي. سواء اخترت معالجة التثبيت بنفسك أو استئجار مقاول محترف، فإن اتباع هذه الخطوات سيساعد على ضمان نتيجة ناجحة وطويلة الأمد.
في الختام، يعد تركيب الجدران الخارجية المركبة PVC لأسقف السقف عملية بسيطة نسبيًا يمكن إكمالها بالمواد والأدوات المناسبة. باتباع الخطوات الموضحة في هذه المقالة، يمكنك الحصول على لمسة نهائية ذات مظهر احترافي من شأنها تعزيز المظهر الجمالي لمنزلك. ضع في اعتبارك الجدران الخارجية المركبة من مادة PVC لمشروع سقف السقف التالي الخاص بك واستمتع بمزايا المتانة وانخفاض الصيانة والأناقة.
PVC composite exterior walls are a popular choice for roof Ceilings due to their durability, low maintenance, and aesthetic appeal. Installing PVC composite exterior walls for roof ceilings is a straightforward process that can be completed by DIY enthusiasts or professional contractors. In this article, we will provide a step-by-step guide on how to install PVC composite exterior walls for roof ceilings.
Before beginning the installation process, it is important to gather all the necessary materials and tools. You will need PVC composite exterior wall panels, adhesive, Screws, a Saw, a measuring tape, a level, and a pencil. Make sure to measure the dimensions of the roof ceiling accurately to ensure that you purchase the correct amount of PVC composite exterior wall panels.
The first step in installing PVC composite exterior walls for roof ceilings is to prepare the surface. Clean the roof ceiling thoroughly to remove any dirt, dust, or debris. Ensure that the surface is dry before proceeding with the installation. If there are any existing wall coverings, such as wallpaper or paint, remove them to create a smooth surface for the PVC composite exterior wall panels.
https://www.youtube.com/watch?v=obXQqMiO9sM
Next, measure and cut the PVC composite exterior wall panels to fit the dimensions of the roof ceiling. Use a saw to cut the panels to the correct size, taking care to make precise cuts. It is important to measure accurately to ensure a seamless and professional-looking installation.
Once the panels are cut to size, apply adhesive to the back of each panel. Press the panels firmly against the roof ceiling, ensuring that they are level and aligned correctly. Use a level to check that the panels are straight and adjust as necessary. Secure the panels in place with screws, making sure to drive the screws into the Studs for added stability.
Continue this process until the entire roof ceiling is covered with PVC composite exterior wall panels. Trim any excess material as needed to create a clean and polished finish. Once the installation is complete, allow the adhesive to dry completely before adding any finishing touches or decorations.
PVC composite exterior walls for roof ceilings are a versatile and practical option for homeowners looking to enhance the appearance of their living space. With proper installation and maintenance, PVC composite exterior walls can provide years of Beauty and functionality. Whether you choose to tackle the installation yourself or hire a professional contractor, following these steps will help ensure a successful and long-lasting result.
In conclusion, installing PVC composite exterior walls for roof ceilings is a relatively simple process that can be completed with the right materials and tools. By following the steps outlined in this article, you can achieve a professional-looking finish that will enhance the aesthetic appeal of your home. Consider PVC composite exterior walls for your next roof ceiling project and enjoy the benefits of durability, low maintenance, and style.